Showing posts with label Flowers. Show all posts
Showing posts with label Flowers. Show all posts
Tuesday, June 12, 2012
A Special Note on Gardening
I love flowers so I tried to grow flowers. I had my first patio last summer and I spent a great deal of time and money setting up my patio garden. I bought lots of affordable pots in bright colors from Wal-Mart. I bought a Groupon for a local nursery to buy strong, healthy plants. I made sure to plant things with right amount of drainage and place them in the right amount of sun.
And they all died. All but the monkey grass. Because apparently you can't kill monkey grass.
Where did I go wrong!?! Oh yeah, the watering bit. Turns out that my gallon watering can still meant 4-5 trips back and forth to water my oh-so-plentiful container garden. (Maybe taking on too much at the start was my problem?) Consequently, my plants only got watered every few days.
If my plants had been in the ground, they would have survived with that. But my plants were on a concrete baking sheet, just roasting in the sun day after day.
So this year I put my plants out on patio near a gardening hose and they get watered every other day at minimum. They are gorgeous!! Pictures will come soon, I promise.
*Note- I still hold with buying quality plants at the start. This year I purchased mine from the local botanical garden's plant sale (Powell Gardens). The few plants I picked up at local supercenters just don't fare as well. Spend the extra dollar and you'll get a plant that blooms more heartily- especially if you're a weak support system for it like me!

Monday, May 14, 2012
In My Next Life I'll Be A Florist
The school in which I work recently held their prom- planned and coordinated by moi (and my fellow coworker K). This was our first year running the prom show and we were given two tasks: 1) Increase attendance and 2) Don't Go in Debt. Obviously if we increase attendance it helps with the debt thing because we have more money from ticket sales. We knew though that we wouldn't be able to up our sales enough this first year to completely make-up the gap in the budget amount. So we slashed our budget. By a few thousand dollars. YIKES!
One of the places we made the cut was the florist. We decided that as 2 handy females, we could manage the centerpieces ourselves. Instead of a $3000 budget line, we spent $300 on vases and another $300 on fresh blooms and fillers. The vases and fillers we can use again, only the fresh blooms are disposable product. Our kids chose peacock feathers as the guiding color/design scheme so we pulled them in where we could. To get the most bang for our buck, we used hydrangea blooms since they have a large "wow" factor per stem. In the end, we spent about $600 total for 20 centerpieces. It took us three hours to assemble the pieces, but everyone was impressed with our handiwork.
While I have certainly made simple vase arrangements before for my own home, I hadn't ever made multiple formal arrangements for a vase. I got comfortable with it though and don't foresee me hiring a florist anytime in the near future. I can do it by myself! Here are some pictures with tips (once again I apologize for photo quality, I was too occupied at the time to remember to grab my nice camera):

If you really need flowers to point in a certain direction, use floral foam. It's the green stuff that makes a huge mess. We avoided using it for that very reason, but you can make more multidirectional arrangements if you do.

One of the places we made the cut was the florist. We decided that as 2 handy females, we could manage the centerpieces ourselves. Instead of a $3000 budget line, we spent $300 on vases and another $300 on fresh blooms and fillers. The vases and fillers we can use again, only the fresh blooms are disposable product. Our kids chose peacock feathers as the guiding color/design scheme so we pulled them in where we could. To get the most bang for our buck, we used hydrangea blooms since they have a large "wow" factor per stem. In the end, we spent about $600 total for 20 centerpieces. It took us three hours to assemble the pieces, but everyone was impressed with our handiwork.
While I have certainly made simple vase arrangements before for my own home, I hadn't ever made multiple formal arrangements for a vase. I got comfortable with it though and don't foresee me hiring a florist anytime in the near future. I can do it by myself! Here are some pictures with tips (once again I apologize for photo quality, I was too occupied at the time to remember to grab my nice camera):
 |
| I call them "swizzles"- they're the twisty glittery twig things and add automatic sparkle and height to arrangements. Plus they're cheap and plentiful! |
 |
| When we ran low on blooms, we just used the feathers we still had left to finish the last centerpieces. A few palm fronds (also cheap) make it look like a floral arrangement despite the lack of actual flowers |

 |
| To get your palm fronds to go where you want, you can crease the stems. Press the stem gently against your fingernail to create a small crease without actually break the stem (then they just flop). |
 |
| Wired ribbon is a must. |
 |
| A visually stimulating vase with a small top means you can get away with using fewer actual blooms. |
 |
| This was the general look of most our centerpieces- white flowers, sprig of peacock feathers, surrounded by candles. |
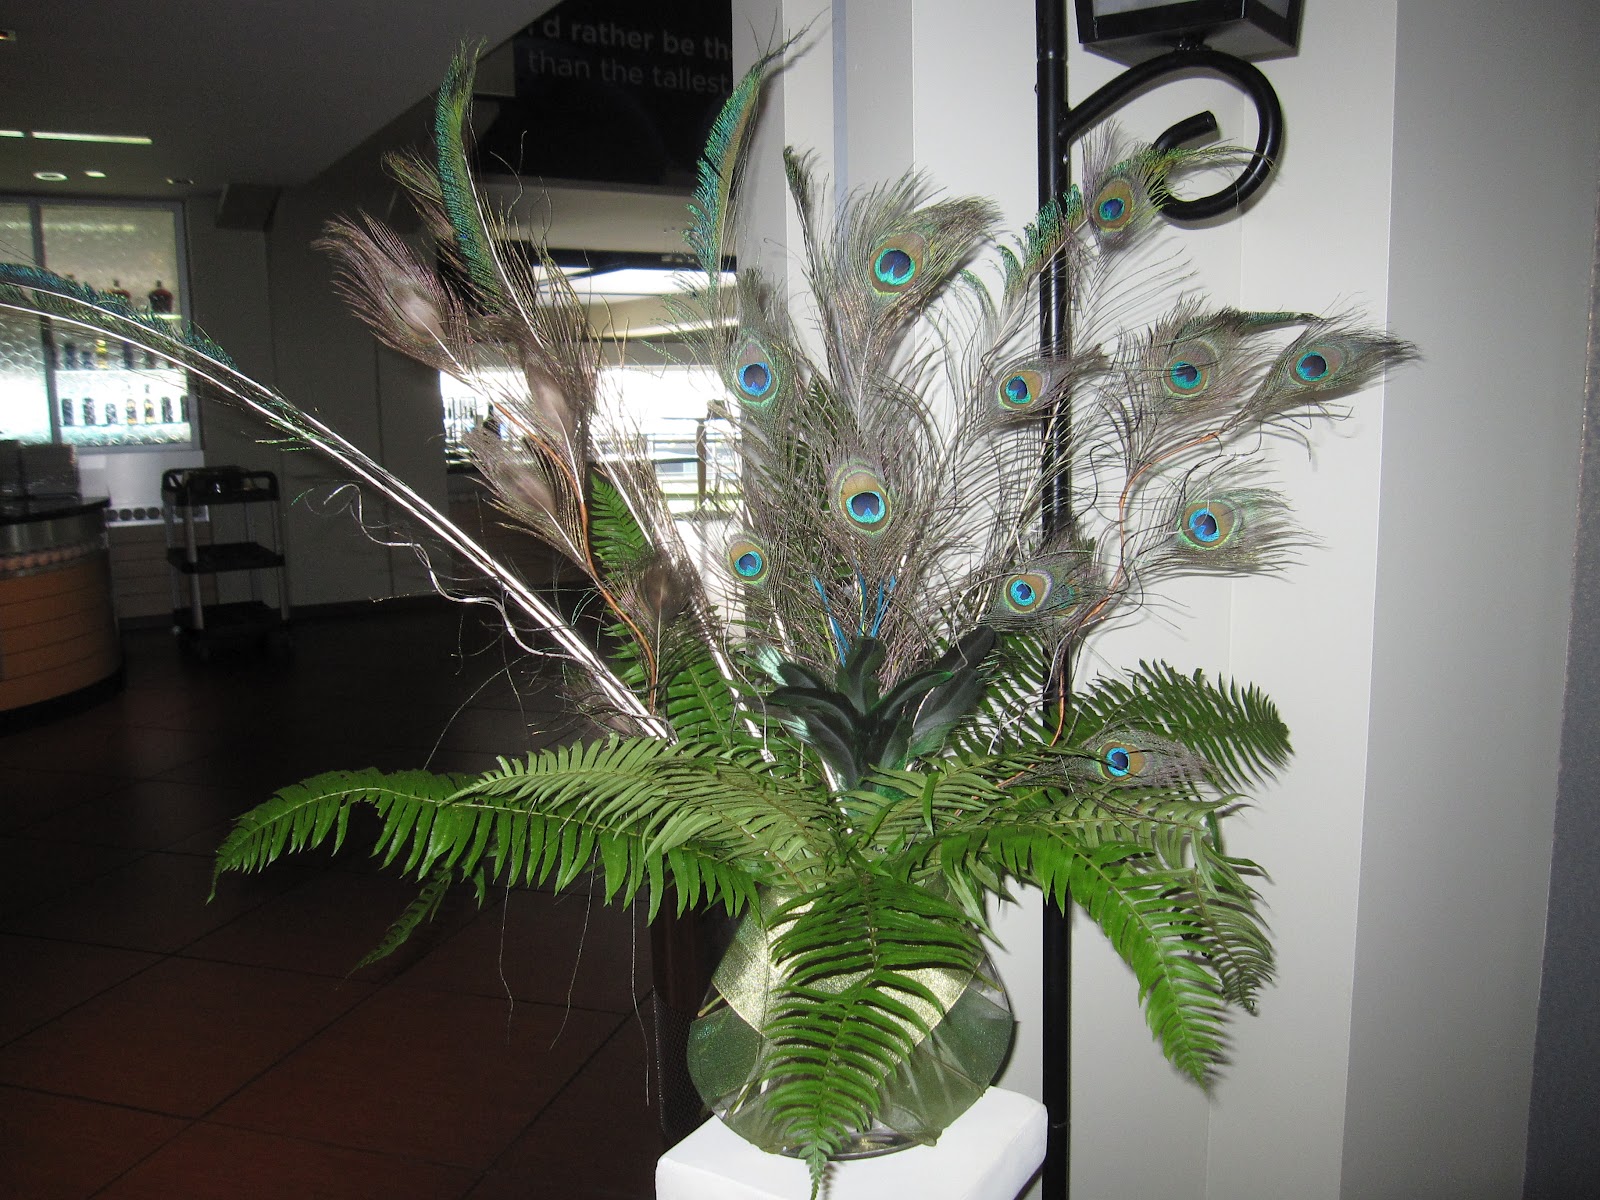 |
| On our feather vases we didn't bother adding water (the greenery keeps a long time before shriveling from lack of water). The inside of the vase though can look unnatural in these flower-less centerpieces so we ribbon wrapped them to hide the interior. |
If you really need flowers to point in a certain direction, use floral foam. It's the green stuff that makes a huge mess. We avoided using it for that very reason, but you can make more multidirectional arrangements if you do.
Monday, April 30, 2012
Pinterest Domination
Get on Pinterest- everyone is doing it.
And on that note- here's the wreath I saw there that I wanted for myself. So I made it. It's been really warm here in our corner of the state and I'm ready for spring!
Inspiration wreath:

Final Product:

I used brighter colors than the one in the inspiration photo. Mostly because that's what I could get my hands on. The final wreath took about 20 sprays of baby tulips all clipped apart. I used an 11 inch foam circle, some low temp hot glue, and got down to business. Basically I bent the ends of the flower sprigs to make an L bend, stuck some hot glue on the end and crammed it down into the wreath so that it laid flat. Layer those sprigs all around the circle and you get a wreath (oh and you have to do the edges and inside too). It took about 2 hours and around $40 in materials. Pretty easy if you're comfortable with silk flowers and hot glue, otherwise it might be kind of intimidating.
And on that note- here's the wreath I saw there that I wanted for myself. So I made it. It's been really warm here in our corner of the state and I'm ready for spring!
Inspiration wreath:
Final Product:

I used brighter colors than the one in the inspiration photo. Mostly because that's what I could get my hands on. The final wreath took about 20 sprays of baby tulips all clipped apart. I used an 11 inch foam circle, some low temp hot glue, and got down to business. Basically I bent the ends of the flower sprigs to make an L bend, stuck some hot glue on the end and crammed it down into the wreath so that it laid flat. Layer those sprigs all around the circle and you get a wreath (oh and you have to do the edges and inside too). It took about 2 hours and around $40 in materials. Pretty easy if you're comfortable with silk flowers and hot glue, otherwise it might be kind of intimidating.
Subscribe to:
Posts (Atom)