Showing posts with label Vacation. Show all posts

Thursday, February 26, 2015

Orlando Day 2

Our package with Universal included early admission to the park and 2 breakfasts in the park. Our first breakfast was for the Three Broomsticks in Hogsmeade. That's on the Islands of Adventure side of the park.

We got up bright and early, donned our Harry Potter themed tanks and headed to the park gates.
We stopped for a few pictures along the way :)
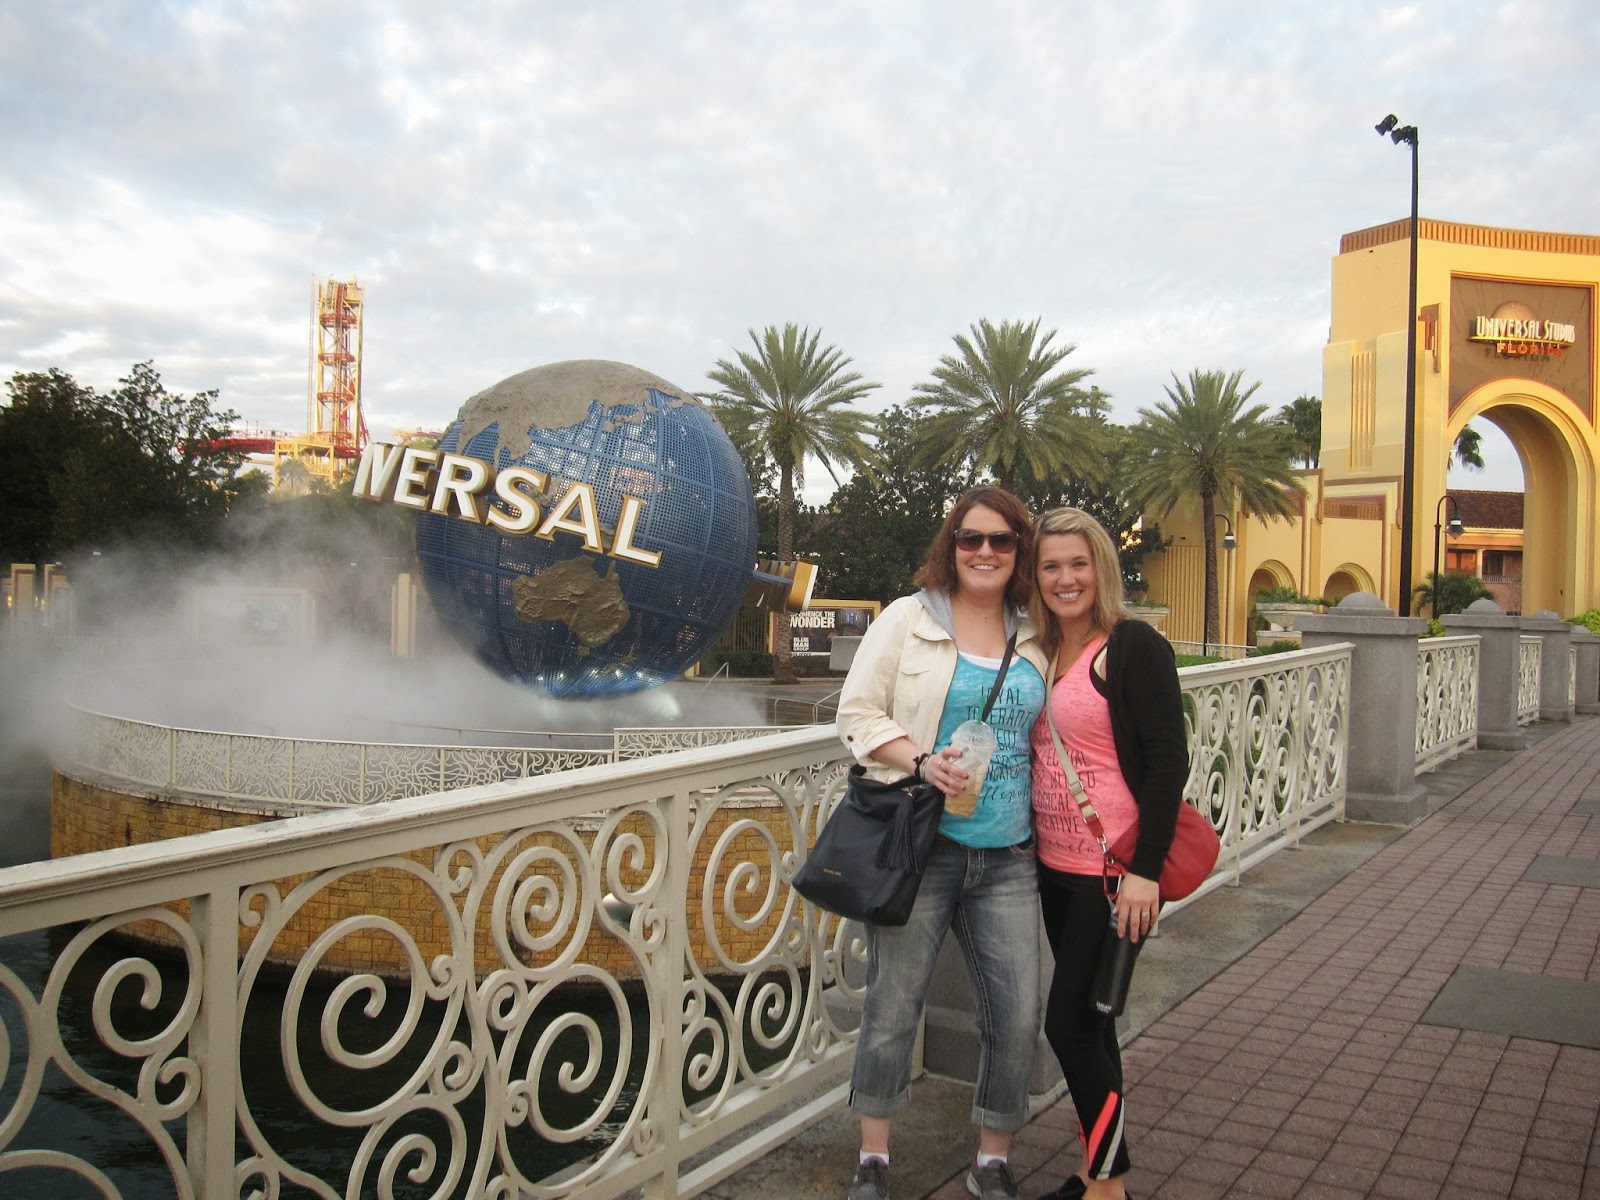


We arrived to Hogsmeade and oh my land- it was all so real! We walked right on to the front row of the blue coaster for Dragon Challenge. Then got off to go immediately back onto the front row of the red coaster. I love riding coasters, so knocking 2 out in our first 15 minutes in the park really set the tone for the day :)

We then got in line for Harry Potter and the Forbidden Journey. It's a super high-tech dark ride that's known world-ride for what the Universal creative team accomplished. It was amazing. It's not your traditional coaster so even the non-coaster-lovers in our group happily rode.

That's me covering my eyes at a scary part. I tried to last through it every time but just couldn't. All I can say is that spiders were involved and this girl doesn't do spiders!

By then it was time for our breakfast reservation but we hopped onto Flight of the Hippogriff first. It's a mini coaster- just a lap bar deal. But for true HP fans, you have to ride it to get the best view of the Hippogriff and Hagrid's cottage.
The breakfast was delicious! We weren't sure what to expect of the theme-park quick service but it was delightful!


We explored Hogsmeade a bit more- the girls bought their wands and we tried out the interactive spell spots. Turns out we are NOT naturals. Haha!


Honeydukes!
We would have ridden the Hogwarts Express to Diagon Alley (aka Universal Studios) but it was down at the moment. So we explored more of IoA first.

We rode the Hulk (love that coaster!!), posed with Thor, and wandered through Seussland and Toon Lagoon.


We grabbed a fast lunch in the cafe right by the Hulk and continued exploring.


We got to Universal Studios and explored some before making Twister our first ride. As far as rides go, it's definitely one for the chopping block. I totally get why it was awesome when it first opened but the technology needs to be updated. Rumor is that's exactly what's going to happen it so I am glad we rode before it's gone forever. I'm also a huge Twister fan and used to play storm-chasers with my sisters on our bikes. So you know, nerd alert.

We wandered up to Diagon Alley and while the detail is just as exquisite we were not AS impressed. The crowds our weekend were some of the slowest of the year yet Diagon Alley was PACKED. It's a tighter space just by nature of design so it feels crowded a lot sooner. It's also obviously the most popular part of that park so every.one. is there.

Your public entrance to the Ministry of Magic!


Weasley's shop
We waited (for the first and only time that day) to ride Escape from Gringotts. It was ok. After the Forbidden Journey it was much less exciting and then our ride had a small glitch that kind of ruined the mood at the end. Plus we went back row at the asinine suggestion of a ride attendant. We decided to give it another try later but moved on pretty quickly (though the queue area was phenomenal).

Wave your wand right and the poor folks under the umbrella will get quite wet!


Then we explored more of the park: Rode the Transformers, Simpsons, and Men in Black rides. We grabbed dinner at a quick service restaurant there (Mel's Drive-In, yummy cheese fries!). We wandered and meandered for a bit to kill time since we wanted to see Universal's evening show. Finally Kari and I decided to just bite the bullet and do it. We rode the Rip-Ride-Rocket.

Lawsy- that coaster was hands down one of the most fun I've ever ridden. You pick a song to listen to while you ride. She and I chose to have the same song and selected Beastie Boy's Sabotage. So basically we're careening through the night with laser lights flashing on our car and track while jamming out to Beastie Boys. Want to feel like a badass? Do that!

We settled onto a park bench for the anniversary lights, water, and fireworks show. It was totally cool and amazing what they could do with their fancy special effects. All the lights in the park are dimmed so you can see the film montage played on screens of running water. The fountains in the lagoon are lit and synchronized to the soundtrack and fireworks go off at the climatic moments. Definitely worth hanging around for!

So to sum up day 2: we explored every inch of both parks, walked over 10 miles, rode almost every major ride, and were thoroughly impressed. And sore. Just a teensy bit sore. :)

Wednesday, February 11, 2015

I Bowled a 46 and STILL Wasn't the Worst in the Room (And also our first night in Orlando)

So we had traveled to Orlando, checked out our room, and were ready to wind down. We decided to check out the bowling alley at our resort. We figured to grab some snacks, drinks, and relax. We were put in a lane next to some way-out-of-towners. Like from another country. Which is TOTALLY cool.....except.....they didn't know how to bowl.

First they were really confused why we were there, basically they thought our lane space was their lane space but we got that all sorted out. Then we started bowling. They still weren't. We realized they were watching, and debating, and figuring out the technology. Those bowling screens are pretty high tech these days.

Then it started. We just couldn't. I mean we COULDN'T let this go undocumented. I've never seen this before. My sister who dated a bowler (and thus spent a lot of time at the bowling alley) had never seen this before.

Needless to say, a couple of drinks, couple of nacho platters (don't judge) later, we were thoroughly amused and in good spirits.

More on the rest of our Orlando trip later, for now, this.


Friday, January 16, 2015

3-day Weekend? 3-day YES

🎶Staycation, all I ever wanted.... Staycation, had to get away! 🎶

This weekend starts with the kick-off of restaurant week!!! Ie- one of our favorite weeks of the year! Stay tuned for a recap and info on how we conquer the week most beloved of foodies in Kansas City. 

In the meantime, I'll happily relax in my paid-for-one-night ultra-long-and-super-perfect tub before hitting restaurant 1 😄

🎶...had to get away...🎶


Thursday, October 18, 2012

Italian Meatballs

I made up this recipe based on several different ones found online when searching for a way to add meet to the pasta alla vodka meal.

The one that sounded most appealing was made with ground turkey. I replaced the turkey with a combo of ground beef and Italian sausage. I also doubled the recipe simple because I didn't want to store the leftover beef and sausage. Instead, I froze the unused meatballs and will use them later in life. :)

Here's the root recipe:
1/2 lb ground beef
1/2 lb Italian sausage
1 cup bread crumbs
1/2 cup Parmesan cheese
1 Tbsp Italian seasoning
1/2 Tbsp Worcestershire sauce
salt and pepper

From the get go I had to make some substitutions simply from lack of ingredients. I didn't have enough plain bread crumbs so I used the rest of the Italian bread crumbs I had on hand. That with the Italian sausage led me to leave the Italian seasoning amount at 1 Tbsp (instead of doubling it to 2). PS- I used my home-made Italian seasoning.

Cast of characters.

After dumping it all into the bowl, I quickly realized only hand mixing would do!

I rolled them out into 1 1/2 inch balls- this was completely random. I just made them about the sized I picture meatballs as being. I baked them in the oven on parchment paper at 375 degrees for about 25 minutes, turning them halfway through.

The remainder went onto another lined baking sheet to sit in the freezer just long enough to set up firm. Once I knew they wouldn't mash all together I dumped them into a freezer bag and sealed them up right.

The freezer tray was not nearly as neat and tidy as the baking tray.
 
 
I will admit that my first meatballs could have baked about less 5 minutes less than they did. With the sauce and pasta though, they were delightful! I can't wait to use my frozen ones for some meatball subs. Yum!

PS- this made about 36 meatballs.


Tuesday, October 16, 2012

Pasta alla Vodka

This post is going to have to happen in pieces.

The root of my desire was some pasta alla vodka that I always order at a local Italian restaurant. They serve their's with cheese tortellini and I decided to try my hand at making my own. I think it needed to have something good and meaty to go with it. The final result was Italian meatballs with cheese tortellini in vodka sauce. Yum!

The sauce recipe I found was from the Pioneer Woman. She's pretty handy in the kitchen so I figured I could trust her. Here's the root recipe:

1 medium diced onion
3 clove garlic, finely diced
3/4 cup vodka
1 can tomato puree
1 cup heavy cream
1/4 tsp salt
pinch red pepper flakes
1 Tbsp butter
pinch black pepper

I sauteed my onion and garlic before adding the vodka to simmer and reduce.

First error here- I'm a teacher and I cook on a shoestring budget. I used cheap vodka. Cheap vodka has stronger flavor and therefore needs to simmer and reduce longer to remove the vodka-ness of the taste. In the future I will honestly just use less vodka. I'm too cheap to shell out money for better stock although that would be the ideal solution.
Next I added the tomato and cream and did the summer and reduce thing some more.

This is much more "red" than the sauce was in reality- my bad flourescent kitchen lighting is not kind to photographs. And no, there isn't a window in my kitchen from which to utilize natural light.
Finally, because Pioneer Woman said so, I added the butter and adjusted the seasonings. A little longer on the simmer and reduce routine finished off the sauce.

I had made my meatballs beforehand and cooked my noodles while making the sauce. I used the pre-made fresh noodles you find packaged in the refrigerator unit at the store. I wasn't a huge fan sadly. I will probably try a couple of different varieties before giving up on convenience tortellini but I have kind of already decided to just use cheese ravioli next time. The sauce though was delicious.


Despite the changes I will make in future editions the meal was still delicious. And pretty!


Wednesday, August 29, 2012

Gringo Dip


For a long time I've been wanting to try my hand at making my own Gringo Dip (normally found at a favorite restaurant, 54th Street). After perusing various recipes, I finally chose the route I would take and made my own attempts. Since I was thinking like a blogger, I actually wrote down amounts as I added them!

First let me say that I didn't use a double boiler. I don't own one. I simply melted my cheese dip with a low temp and lots of patience on the stove. As long as you stir frequently and keep those temps low (my dial was on 4), then you should be OK.
 
Recipe:
4 oz pepper jack cheese, cubed
4 oz monterey jack cheese, cubed
4 oz Velveeta, cubed
1 cup half and half
3/4 cup pico de gallo
1/4 tsp cayenne pepper
2 tbsp parmesan cheese, grated
2 1/2 oz frozen chopped spinach

I put everything in the pot but the spinach and stirred until it was all smoothly melted. Then I added in the spinach and cooked until the spinach was all thawed and mixed in. It makes about 4 cups of cheese dip. We ate half the pot and I filled a 2-cup tupperware with leftovers.

How this compares to other recipes:
I used plain old yellow Velveeta so my cheese is more yellow than the original. You could buy the white Velveeta, but I just used what I had on hand. Also, I used way less spinach than other recipes call for. I don't care for spinach and simple tolerate it in recipes like this. Even still, Sig agreed that any more would have made for a spinach dip instead of a queso dip. This recipe is also much smaller in size than the other copy-cats I've seen.

What I will do different next time:
Sig likes his dips more spicy so I will probably add more pepper jack and take away some monty jack. You can always add more cayenne too (which is the type of heat I prefer). I initially thought I should use less half and half but my teacher brain kicked in to remind me that cheese sauces thicken upon standing. The consistency turned out perfect!

How much it cost:
Like me, you probably have the Velveeta, cayenne, and parmesan on hand. I bought fresh pico from the deli section for $3, monty jack and pepper jack cost me another $4, half and half was $2 and the spinach $1.50. The remaining pico will be used in recipes later this week, the remaining cheese will keep, and I'll make sure to use the half and half before it expires. I measured my spinach still frozen, so that remaining will keep in the freezer too. All in all it probably comes about $6 worth of ingredients.

And because we're piglets, the only photo I have to share is the one of the leftovers. This will probably be my very unhealthy lunch tomorrow!


*Please ignore my dirty stone- we had stuffed peppers for dinner with the dip. I promise it was cleaned appropriately!

Wednesday, August 15, 2012

Homemade Spice Mixes

I found this idea on Pinterest of course. I made my own taco seasoning, ranch seasoning, onion soup mix and Italian dressing mix. The first three came from Jamie over at Self-Reliance. The last came from a combination of places (I adjusted it to suit my own needs).

Taco seasoning is used for tacos of course (beef or chicken). The ranch seasoning can be used for ranch dressing, but I mostly use it to make ranch dip. The onion soup mix I use for dips and to flavor my pot roasts. The Italian dressing I use exclusively for seasoning buttered bread on any night we have pasta. This is the only time I use the seasoning but it happens at least once a week. Italian dressing is something I only use for marinade so I prefer the zesty version- not made with this seasoning mix.

I added up the amounts I needed and double-checked the quantities I had on hand in my spice cabinet. I ended up spending about $30 on spices, but I bought the large quantity size so I'm ready to make more mixes when I need it. I filled 2 pint jars each and used the little round canning sticker labels you can buy in the store (about $9 spent on the jars and labels). If I were gifting these then I would have made cuter labels with my Cricut. But for my own pantry, a handwritten sticker will do.


Ranch:
5 tablespoons dried minced onions
7 teaspoons parsley flakes
4 teaspoons salt
1 teaspoon garlic powder
 
Dry Onion Soup Mix:
2/3 cup dried, minced onion
3 teaspoons parsley flakes
2 teaspoons onion powder
2 teaspoons turmeric
1 teaspoon celery salt
1 teaspoon sea salt
1 teaspoon sugar
1/2 teaspoon ground pepper
 
Taco Seasoning:
1/2 cup chili powder
1/4 cup onion powder
1/8 cup ground cumin
1 tablespoon garlic powder
1 tablespoon paprika
1 tablespoon sea salt
 
Italian Dressing Mix:
I'll tell you when I find the paper I wrote it down on....
3/4 tsp garlic powder
2 1/4 tsp sea salt
1 tbsp onion powder
1 1/2 tbsp sugar
1 tbsp dried oregano
1 tbsp gound oregano
1 tsp pepper
1/4 tsp thyme
1 tsp basil
1 tbsp parsley
1/4 tsp celery salt
 
And ta-da! Healthy and convenient mixes I can simply spoon out at my pleasure. I keep a jar of each in my spice cabinet with the spare jars in the pantry. I'm about half-way through my first jar of the Italian already, and a third way through my taco. The ranch I've used minimally, but I have some potato recipes I'm going to play around with. The onion soup will get used the most heavily this fall when I'm making roasts again. It's simply too hot this summer for such a heavy meal!
Enjoy!


Monday, June 11, 2012

Better Poppyseed Dressing

So with all this madness with the new house, me moving to a new apartment, working like crazy, and being lazy, I don't work out much. I figure when I'm settled in the new town I'll figure out some fitness plan. In the meantime, I eat a lot of rabbit food and try to keep my diet in check. (Except that it's summer so that means I have a lot ice cream right now.) Not to mention, a cool salad on a hot day is my idea of perfect.

Now as far as salads go, I adore Panera. They rock my world, especially now that I get free stuff every time thanks to the myPanera card. But I can't afford to buy every rabbit meal I eat, therefore I cook. Since it's summer, Panera has their strawberry poppyseed salad available. As much as I love most of their salads (the Cobb, Caesar, and Asian are favorites of mine), this one doesn't do it for me. Because I've found a recipe one better. ;-)
First make this dressing, it should make enough for a few salads a week for lunch:
¾ cup sugar (or Splenda if you're like that)
1/3 cup cider vinegar (or you can use an apple balsamic)
1 tsp. salt
½ cup oil
1 tsp. dry mustard
½ tsp poppyseeds
Mix it all together and store in a covered container. If you get fancy you can actually buy salad dressing containers to keep your home-made dressings in. I want one (or three) but haven't actually found any I like yet. I'd love suggestions!
Then when lunch time comes, all you need to do is tear open a bag of romaine lettuce or spinach (use a dark colored leaf for maximum flavor and vitamins), slice up an apple and strawberries, toss in some walnuts, celery, and green onion, bada bing, bada boom, you've got a yummy summer salad.
I chop the strawberry, celery and green onions ahead of time and keep in another container ready to go. The apple I slice daily because I'll end up eating the whole apple.

It's a great meal because it tastes like summer (we all know how obsessed I am) but it has ingredients easily available during the winter. Not to mention you get two servings of vegetables and one serving of fruit in one meal. Fabulous!
*PS- this salad is super cute for Fourth of July, add some blueberries to make a red, white, and blue color splash.
*PPS- this is also good with chicken if you're looking for the protein. If I add chicken, I usually use some leftover rotisserie chicken because it's more salty (to balance with the sweet dressing).

Disclaimer- this isn't an "original" recipe. I have seen versions of it ALL over the place. I have no idea who the original creator is, they are a genius though.


Monday, May 21, 2012

Pot Roast Nachos

So I went to M&S Grill for my girl's night out. We had pot roast nachos and they were amazing. Such a simple concept right?! Pot roast on nachos instead of chicken. Easy peasy. And seeing as how I'm a foods teacher, I decided to conquer this piece of heavenly delight.

Originally I figured I would just wing it. I would by some big tortilla chips, spread them with pot roast, a little fresh pico (easily purchased in your grocery's deli department), sprinkle with cheese, and broil till melted and toasty. Easy right? Well I decided to investigate the web anyway just in case there was a copy-cat recipe out there.....and there was! It was a little more intense than I was figuring on so I hesitated, but I had the time, money, and inclination to take it on. Boy am I glad I did!

The secret is the aioli. I have never made one before so I was a little nervous. Fortunately this is kind of a cheater aioli and is pretty much just flavored mayo. I did, however, remember again why you should wear gloves when chopping peppers because that Serrano juice has been dangerously close to my eye more than once this evening. I also tried my hand at making my own chips, and while tasty they weren't as crispy as I desired. If I used store-bought chips I think the saltiness of the dish might be too high (I don't like salty). I discovered my problem was the tortillas I fried. I use flour and should have used corn.

My aioli tasted good but I had twice as much as I needed, it's very spicy so a little goes a long way, and mine was a little runny. Luckily it refrigerates and should keep for a while. In the future I'll use less lemon juice to make it a bit thicker (I didn't use any of the canola btw). I also sprinkled mine with a Mexican blend of cheese- I liked having the white and orange mixture but the seasonings weren't needed. The future versions will probably just have straight up cheddar. I also sauteed my vegetables like a good little FACS teacher, but it was stupidly time consuming so next time I'm just going to use the pre-made pico. It'll work. Now the pot roast- ideally you would use your left over roast. I don't have left over roast. When I make pot roast, we eat the whole thing. But I like "leftover" roast recipes so I've come across a cheater roast that's really good. It's the Hormel brand Beef Roast Au Jus and is super convenient. Not to mention pretty cheap. Here's the final product:
In case you can't tell- I couldn't wait to try a bite before taking the picture.

And here's the recipe, as found here:

Delicious Pot Roast Nachos

  • Time 20 minutes
  • Serves 4

Ingredients

  • 4 each 8 inch tortillas cut into quarters and fried
  • 2 cups leftover pot roast (rough chopped)
  • 1 cup chili aioli (see below)
  • 1 cup peppers, sliced and sautéed
  • 1 cup yellow onion, sliced and sautéed
  • 3 cups shredded cheddar or mixed cheese
  • For the Chili Aioli:
  • 1 jalapeño, seeded and diced
  • 1 Serrano chili, diced
  • 1 tsp. red pepper flakes
  • 1 tsp. minced garlic
  • 1/4 cup lemon juice
  • 1/2 cup mayonnaise
  • 1-2 Tbsp. canola oil
  • Sugar, to taste
  • Salt and pepper, to taste

How to make it

  • Lay tortillas flat on a baking sheet
  • spoon 1 tablespoon of chili aioli on each chip
  • divide the peppers and onions on all the chips
  • divide the pot roast on all the chips
  • divide the cheese on all the chips
  • broil until cheese is melted (about 5 minutes)
  • top with salsa and green onions and serve
  • For the Chili Aioli:
  • • In a food processor, combine the jalapeño, Serrano chili, red pepper flakes, and garlic until finely minced. Add the lemon juice and mayonnaise.
  • • Gradually add the canola oil until the mixture is slightly thinner than mayonnaise. Season with the sugar, salt, and pepper.
  • • Refrigerate until ready to use.